

Blog
7 Best Food Vacuum Sealers for Home Use
Choosing the right food vacuum sealer can make everyday storage cleaner, easier, and less wasteful. A fresh loaf stays protected from freezer burn. Marinated chicken can rest in its own juices. Even chopped vegetables may keep their texture longer when sealed correctly. However, not every machine suits every kitchen, budget, or cooking habit.
This guide examines seven of the best food vacuum sealers for home use. We compare suction strength, sealing consistency, bag compatibility, noise, controls, cleaning, and countertop storage. These details matter. A powerful motor means little if the seal fails around oily food. A compact design helps small kitchens, but narrow drip trays can create extra cleaning work. I have also considered practical experiences, such as sealing soft berries, wet marinades, and family-sized portions.
Food safety remains essential. Food scientist and sous vide authority Douglas Baldwin states, “Vacuum packaging is not a method of preserving food; it is a method of packaging food.” That warning deserves attention. Vacuum sealing removes air, but it does not replace refrigeration, freezing, or safe handling. Keep perishable food cold. Label sealed packages with dates. Do not assume a tight bag makes questionable food safe.
Some choices are imperfect. One model may offer excellent suction but feel bulky. Another may be affordable yet struggle with liquid-heavy foods. That trade-off is normal. By comparing real household needs with measurable features, this review aims to identify the food vacuum sealer that offers dependable value, not merely impressive specifications.
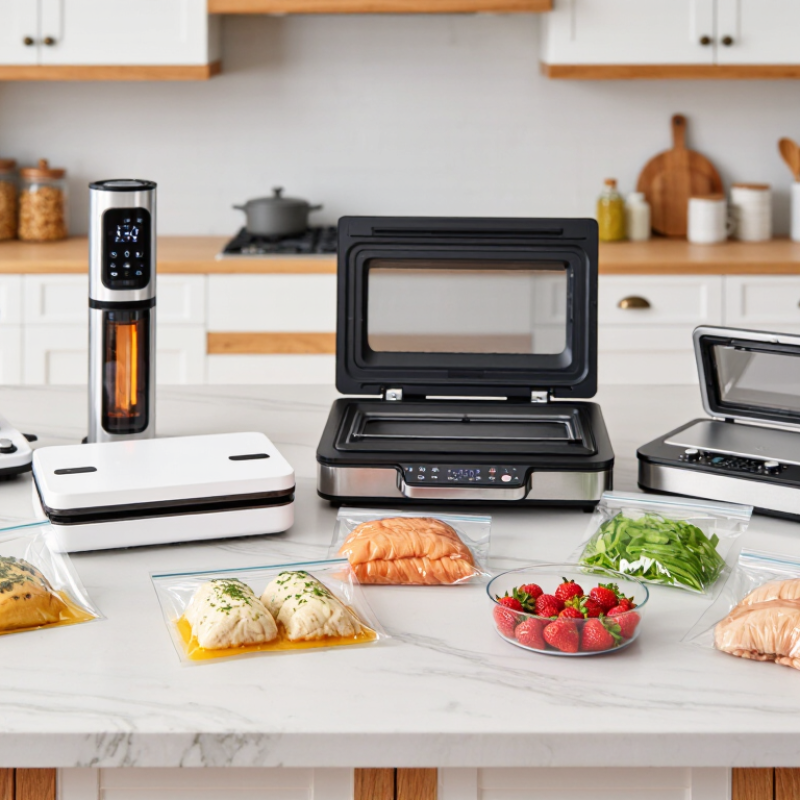
What Is a Food Vacuum Sealer and How Does It Work?
A food vacuum sealer removes air from a specially designed bag, then closes it with a tight heat seal. Less oxygen slows oxidation and limits the environment where many spoilage organisms grow. It can help preserve meat, vegetables, cheese, and prepared meals, but it does not make food permanently safe.
Most home models use an external pump. The bag sits inside a sealing channel, and the machine draws air through its textured surface. Afterward, a heated strip melts the bag layers together. Some machines offer pulse control, which is useful for soft fruit or bread. I have found this feature more practical than maximum suction. Strong pressure can crush delicate food and pull liquid into the pump. That mistake is easy to make.
When comparing seven home vacuum sealers, examine seal width, suction control, cleaning access, and bag compatibility. A reliable sealer should create an even seal without weak corners or wrinkles. Store sealed foods at safe refrigerator or freezer temperatures. Vacuum sealing cannot replace proper chilling, cooking, or hand hygiene.
Tips: Freeze juicy foods briefly before sealing. Leave enough space above the food for a flat seal. Wipe the bag edge completely dry. Check each seal before storage, because one small leak can spoil the package. Avoid sealing hot food directly; steam may weaken the closure. Keep a date label on every pack.
7 Best Food Vacuum Sealers for Home Use - What Is a Food Vacuum Sealer and How Does It Work?
A food vacuum sealer removes air from a specially designed bag and then heat-seals the opening. Reducing oxygen helps slow oxidation and limits the growth of many spoilage organisms, while airtight packaging helps prevent freezer burn and protects food from moisture and odors.
| Recommended Use | Sealer Type | Typical Maximum Bag Width | Vacuum Strength | Control Options | Typical Sealing Time | Important Advantages | Best Food Handling Practice |
|---|---|---|---|---|---|---|---|
| Everyday household use | External suction sealer | Approximately 28–30 cm (11–12 in) | Approximately 0.6–0.8 bar below atmospheric pressure | Automatic vacuum-and-seal; manual stop | About 10–20 seconds | Simple operation, compact footprint, suitable for meat, cheese, vegetables, and dry goods | Pat food dry and leave at least 7–8 cm of clear bag above the food |
| Frequent meal preparation | External suction sealer with pulse control | Approximately 28–30 cm (11–12 in) | Approximately 0.7–0.9 bar below atmospheric pressure | Dry, moist, pulse, cancel, and seal-only settings | About 8–18 seconds | Pulse mode gives better control for soft foods and reduces liquid entering the pump | Freeze liquid-rich foods first, then vacuum-seal them once firm |
| Large cuts and bulk portions | Wide external suction sealer | Approximately 35 cm (13–14 in) | Approximately 0.7–0.9 bar below atmospheric pressure | Automatic cycle, manual vacuum, and seal-only operation | About 12–25 seconds | Wider bags accommodate roasts, whole fish, family-size portions, and long vegetables | Use textured vacuum bags; ordinary smooth storage bags generally do not work with external suction systems |
| Sous vide cooking | External suction sealer with moist-food mode | Approximately 28–30 cm (11–12 in) | Approximately 0.6–0.8 bar below atmospheric pressure | Moist mode, pulse control, double-seal option, and cancel button | About 10–20 seconds | Creates a close-fitting package and helps reduce floating during water-bath cooking | Use heat-rated bags and leave enough space for a strong seal above the food |
| Long-term freezer storage | External suction sealer with double heat seal | Approximately 28–30 cm (11–12 in) | Approximately 0.7–0.9 bar below atmospheric pressure | Adjustable seal time, manual vacuum, and repeated sealing | About 15–30 seconds | A wider or double seal adds protection against leaks and freezer dehydration | Label the package with the food name and date; vacuum sealing does not replace safe freezing |
| Wet foods and marinades | Chamber-style sealer | Approximately 25–30 cm (10–12 in), depending on chamber size | Approximately 0.8–0.95 bar below atmospheric pressure | Adjustable vacuum percentage, sealing time, and vacuum pause | About 20–60 seconds per cycle | The entire bag is inside the chamber, so liquids are less likely to be drawn into the pump | Use chamber-compatible bags and keep the sealing area clean and dry |
| Small kitchens and occasional use | Handheld vacuum sealer with valve bags | Bag-dependent; commonly 20–28 cm (8–11 in) | Typically lower than countertop sealers | One-touch vacuum control; separate heat sealing may not be available | About 10–30 seconds, depending on bag size | Very compact, portable, and useful for reusable containers or short-term storage | Check the valve and zipper for cleanliness; do not use it as a substitute for a heat-sealed bag when leak resistance is essential |
Related Posts
-

China Top Vacuum Sealer Machine Manufacturers Guide
-
2026 Best Vacuum Food Sealer Machine for Global Buyers
-
How to Choose a Commercial Food Vacuum Sealer in 2026?
-
2026 Best Commercial Vacuum Sealer Machine for Buyers
-
Why You Need a Meat Chamber Vacuum Sealer for Perfect Food Preservation
-
How to Choose the Best Vacmaster Vacuum Sealer for Your Needs?